Showing posts with label Anna. Show all posts

Monday, February 24, 2014

BREAD on MONDAY - Homemade Bread, No Matter What!

  A few months ago, my electric oven finally bit the dust. It completely went out, frying and sizzling as it died. The broiler part broke quite a long while back, but a few months back, the rest of it broke. Actually, I might have added to it. I was trying to "fix" it, when it finished breaking. It wasn't working right, though, that was for sure, because once it completely broke, my electric bill really dropped! So its breaking was probably a blessing in disguise.

I can't afford a new stove/oven right now (stove top broke years ago), so I have been playing around with alternative cooking methods. There really are quite a few of them, you know? We should never get so dependent on one cooking method that we don't know any other way to cook. We should always know how to use several options, for whatever reason we might need them.

I love my homemade breads, and I have been using a bread machine to make them, since my oven was broken. I have more than one bread machine, but I have been using my favorite, which is also my biggest one. One day, recently, I had it going and just a few minutes into its initial mixing/kneading cycle, I heard a really strange noise coming from it. I went to check and my favorite bread machine had broken!!! *cry - sniff* My other bread machine is considerably smaller, and I just did not feel like dragging it out of the closet, switching them around, and trying to start the cycle all over, plus it wouldn't have all fit into that machine.

So what did I decide to do? Well, I had had a nice fire going in my wood stove all day (with which I heat my house), and it was getting down to some really good coals, so I decided to cook my bread in there. I dumped the dough out onto a floured platter, kneaded it by hand, pinched it off into hot rolls, and placed them into a well oiled 2-quart cast iron Dutch oven. By the time they had risen to more than doubled, the coals in the wood stove were just right for baking.

I cleared out a space in the middle of the coals (if they are too close, they will quickly burn what you are cooking), placed the covered Dutch oven in the cleared out space, and in no time I had light, moist and delicious hot rolls ready! As soon as I pulled them out of the "oven" I thoroughly rubbed a stick of butter over them. They were crispy, crunchy on the very outside, and so light and fluffy on the inside. The were fantastic!!! I will definitely be doing this again.
And as an added plus, it didn't cost anything for utilities (electric) to bake this batch of bread because I already had the wood stove going to heat the house, with wood that came off of my property and my fiance had cut. So now, while it is cold, I am doing almost all of my cooking in that old wood stove and loving it! I love the food, and I love the reduced electric bill.
This should work with any Basic White Bread recipe. Just remember to shorten the baking time. 

HOT ROLLS baking in my wood stove.

Sunday, December 9, 2012

Don't Toss Those Iddy Biddy Pumpkins!

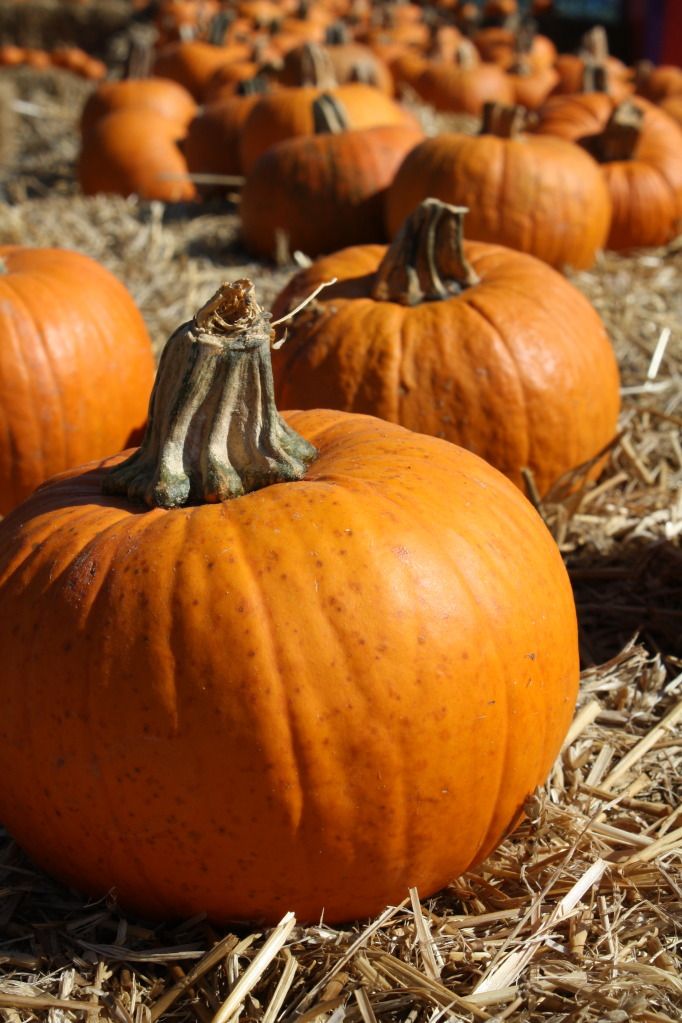
 Many of us get them each year, then toss them out right after Thanksgiving, sometimes even sooner.... those tiny little orange pumpkins that we use to adorn our tables and scatter amongst our Fall decorations and displays. They are so pretty and adorable. And kids love to paint faces on them for Halloween. But did you know that they are edible?!

Yes, they are just as edible as any Pie Pumpkin. Not only are they edible, but they are delicious!!! Inside, these pumpkins have a nice, thick wall. The seeds can be pulled out, cleaned, then saved for roasting or planting. But the pumpkins can be baked for a very tasty and nutritious meal. Bake several and scoop the soft meat out to make a delicious pie. They can be used for anything you would normally use pumpkins for.... they are pumpkins! It just might take a few of them. When baked, the meat of these wonderful little pumpkins is surprisingly sweet and very smooth and creamy. The texture is not at all stringy, just sweet and smooth. In fact, I find them to be even smoother and sweeter than many pie pumpkins.

There are many ways you can cook these pumpkins. You can even stuff the inside with your favorite meatloaf recipe and bake for adorable individual servings, but my favorite way is to just bake them as I do my Acorn Squash. Simply cut the tops off (much easier than you would think, but be careful that knife doesn't slip), remove the seeds (comes out easily and quickly), add a couple of your favorite ingredients, place the cut top back on, place in a shallow pan of water and bake. The following instructions is a little better detailed.

Baked Jack Be Little Pumpkins 

  • A few Jack Be Little Pumpkins (those iddy biddy orange or white pumpkins)
  • Butter
  • Sugar
  • Cinnamon
  • Water
Preheat oven to 350°F.

Wash pumpkins thoroughly.

Slice tops off of pumpkins. I like to make the cut at a slight downward slant. 

Remove seeds from pumpkin and set aside for whatever later use you choose for them.

Place pumpkins in a shallow baking pan, leaving a little space between each pumpkin.

Inside each pumpkin, add a pat of butter, a spoon of sugar, and a small sprinkle of cinnamon. (I like to use the True Cinnamon). The amounts of each ingredient are strictly up to personal taste.

Place top back on each pumpkin.

Pour water into your baking pan, around the pumpkins, until water is about 1/2-inch deep in pan.

Place in preheated oven and bake for 45 minutes to 1 hour, until pumpkins are tender and sugar filling has turned to syrup. Cook time will vary according to the size and number of your pumpkins. 

Serve hot with your favorite meal. I even like to eat them cold! These are so yummy!


Monday, December 3, 2012

BREAD ON MONDAY - Cranberry Nut Bread

When I was growing up, I adored the Christmas season. With typical child-like impatience, I eagerly anticipated each and every event of the season's progression. And one thing I anticipated the most was Christmas morning breakfast! As with most parents, ours were up late putting gifts under the tree for "Santa" because we were so excited  anticipating his coming that we took forever to go to sleep. Naturally, that was the one day of the year that we popped up out of bed early, usually before the sun even came up! But Mom and Dad wanted to SLEEP!

We were allowed to open our stockings, but were weren't to touch anything else before they got up... not even TOUCH anything. But there was always something extra good waiting for us to eat for breakfast while they snoozed as long as we possibly let them snooze. Usually, it was an assortment of quick breads and fruits. My favorite, one of the things I looked of forward to Christmas morning for, was, you guessed it.... CRANBERRY NUT BREAD! I could hardly sleep not only knowing that Santa was coming, but that when I got up, that wonderful, tangy-sweet, moist bread would be waiting for me. Mmmmmm..... I can smell it even now just thinking about it.

And now, I would like to share with you the recipe for that wonderful Cranberry Nut Bread that I so looked forward to with impatient anticipation each and every Christmas season:

Cranberry Nut Bread

  • 1 cup fresh or frozen cranberries, coarsely chopped
  • 1/2 cup chopped nuts (I prefer pecan or walnut)
  • 1 T. grated orange peel (fresh)
  • 2 cups all-purpose flour
  • 1 cup sugar
  • 1 1/2 tsp. baking powder
  • 1 tsp. salt
  • 1/2 tsp. baking soda
  • 2 T. shortening
  • 3/4 cup orange juice
  • 1 large egg, well beaten
Preheat oven to 350°F. Generously grease and lightly flour a 9x5x3 inch loaf pan.

In medium mixing bowl, stir together flour, sugar, baking powder, salt and soda; cut in shortening.

 Stir in orange juice, egg and orange peel, mixing just until moistened.

Fold in cranberries and nuts. Pour into prepared pan.

Bake 1 hour or until toothpick inserted in center comes out clean. Be careful not to overcook, as it will make bread dry.

Cool on wire rack 15 minutes. Remove from pan and cool completely.

When completely cool, wrap and store overnight before cutting to increase moistness. Makes 1 loaf. 

Saturday, December 1, 2012

SOUP ON SATURDAY - Turkey Carcass Soup

 I am sure most of you have tossed your turkey bones out by now, but while thoughts of Thanksgiving and leftover turkeys still lingers on my mind, I wanted to share with you my recipe for Turkey Carcass soup. Before you think, "yuck!", look the recipe over and really consider giving it a try. It is absolutely wonderful! I missed out on getting to make it this year, as the person that brought the turkey to our Thanksgiving dinner, threw the bones out in the trash before I could intercept them. That just killed me! That lost pot of tasty soup has been on my mind so much this past week that I think I am going to have to cook me a small turkey just so I can get a good pot of soup. This works well with either a baked or smoked turkey (or fried, for that matter). So go ahead, give it a try, you will be surprised at how wonderful it is!

Turkey Carcass Soup

  • 1 fresh turkey carcass (from a cooked turkey), all meat removed
  • 1 cup drippings from turkey (or more to taste)
  • water to fill cooking pot
  • 3 fresh carrots, thinly sliced
  • 3 ribs celery, thinly sliced
  • 2/3 cup chopped onions
  • 2-3 cups finely chopped, cooked turkey
  • 1 1/2 T. dry parsley flakes (fresh is also good but use a little more)
  • 2 tsp. salt (or to taste)
  • 1/4 tsp. black pepper (or to taste)
  • 1 (12-ounce) pkg. small noodles, cooked according to package
Pull apart the turkey carcass bones and place in a large pot with pan drippings. Cover with water. 

Bring to a boil, reduce heat and hard simmer for about an hour. 

Remove all bones with slotted spoon. When cool enough to handle, remove any remaining meat that you may still find on the bones and set aside; discard bones where pets won't be able to get them.

Add all of the turkey, carrots, celery, onion, parsley flakes, salt and pepper to the pot of now wonderful broth. 

Return to simmer and cook until vegetables are tender.

Add cooked noodles; heat through and serve. Mmmmm..... good!


Note: This recipe is very flexible. The amounts of the vegetables is easily alterable. You can also add other vegetables that you like to the pot. This is the blend that my family likes, although I sometimes like to also add canned tomatoes and corn. Enjoy!

Friday, November 30, 2012

Cooking Tip #1 - Wash Those Pumpkins!

 Many people, at this time, are canning and freezing up their bountiful harvest of pumpkins, putting up the ones they found on that wonderful super sale after Halloween and Thanksgiving were over, or just plain making up some delicious pumpkin pies. Pumpkins are so versatile and packed with nutrition, they are well worth the effort of putting them up for use all year long.

But before you begin to cut into one of those pumpkins, be sure and wash the entire outside off thoroughly with a naturally antibacterial soap. Give it a good scrubbing. Make extra sure you get into all of those creases and crevices. Weather you purchase your pumpkin at the grocer, from your local farmer's market, or grow it yourself, there is always the risk that odd, unusual and even dangerous germs could be lurking on the skin of those pumpkins. The cooler, damper climate of Fall, with fluctuating warmer days just before pumpkins are harvested, can lend to a faster growth/spread of some germs and fungi. A good scrubbing should easily take care of anything that might pose a danger and is very easy to do.

Then let your pumpkin(s) air dry. Don't get in a hurry and be tempted to dry them off with that dish towel that is setting right there at your fingertips. You will just put germs right back on your pumpkin! Especially for long term storage, you want every germ possible off of your pumpkin before you cut into it. If you don't wash them, and any unsafe germs are on the skin of your pumpkin, the moment you stick your knife into it, you push the germs right inside, where they quickly absorb into the softer flesh.

Have a happy and tasty holiday season, and watch for more great cooking tips to come!

Monday, November 26, 2012

BREAD ON MONDAY - Puffy Dumplings

 Throughout the winter, I love to make a lot of soups and stews. Sometimes I like cornbread with them, and sometimes hot rolls, bread, or just plain crackers. But often times I especially like to mix up a batch of my Puffy Dumplings and drop on top of a steaming hot pot of soup/stew. They puff up nice and fluffy, while a just a little of the soup adheres to the bottom of the dumpling. Mmmmm..... are they good! They are also great in Chicken and Dumplings or, as many are making right now with their leftover turkey... Turkey and Dumplings. Here is my recipe.  Make sure your soup is boiling/simmering, or nearly there, before beginning. This recipe easily doubles if you are cooking a large kettle of soup.  Picture to be posted soon.

PUFFY DUMPLINGS

  • 1 cup all-purpose flour (I prefer unbleached)
  • 2 tsp. baking powder
  • 1/2 tsp. sugar
  • 1/2 tsp. salt
  • 1/2 cup milk
In medium bowl, sift together flour, baking powder, sugar and salt.

Stir in milk and mix well.

Drop large, rounded tablespoonfuls into hot, boiling/hard simmering, stew, soup, or chicken and dumplings. Give a quick, gentle stir to make sure all dumplings are coated with the hot liquid and are separated.

Cook, uncovered, 10 minutes. . . . Cover and cook for about 10 minutes more, or until dumplings do not appear doughy in center. This time could vary according to the size of your dumplings. Sometimes I like to make mine a little bigger than this (larger spoonfuls of dough).

It is VERY IMPORTANT that you do NOT open the lid during the second half of the cooking time or dumplings could become very soggy. Also do not stir during any of the cooking time.

If you want to add a little additional flavor to your dumplings you can add a little powdered seasoning (such as poultry seasoning, garlic powder, onion powder, etc.) to your dry ingredients before mixing in the milk.

Serve hot, but be careful! These dumplings stay hot in the center for a very long time. Be especially careful when serving to small children. 

Monday, November 19, 2012

Bread on Monday - Homemade Biscuits

As the chilly mornings of Fall begin to move towards the downright cold mornings of Winter, nothing beats a fresh, piping hot pan of homemade biscuits for breakfast. On a really ambitious day, I like to make up an extra big batch of biscuits, then warm the remaining biscuits up to eat with a big bowl of homemade soup or stew for dinner. Then, on this particular week (Thanksgiving week), any extras you might have (I know, leftover biscuits are rare), are great crumbled up and tossed into your Thanksgiving Dressing pot. Feel free to ask any questions you might have about this recipe, in the comments. If you are wondering something, chances are, someone else is too.

Anna's Homemade Biscuits

  • 2 cups all-purpose flour (I prefer to use unbleached)
  • 1 T. baking powder (I use aluminum free)
  • 1/2 teaspoon salt (I use natural sea salt - processed without chemicals)
  • 1 teaspoon sugar (I use evaporated cane juice, but any sugar is fine)
  • 1/3 cup vegetable shortening
  • 3/4 cup milk
  • a little extra flour

Preheat oven to 450° F. Grease and have ready a biscuit pan or baking sheet.

In a medium bowl, sift together flour, baking powder, sugar, and salt; mix well.

With a pastry cutter/blender (or fork or knives), cut shortening into flour mixture until evenly crumbly.

Add milk to flour mixture. Mix together well, finishing mixing with the hands, as it becomes very thick. Knead dough a few times, adding in a little more flour, if necessary, so that dough is no longer sticky. Careful not to get too much flour as this will make biscuits tough.
 
On a floured board or pastry cloth, roll dough out to 1/2 to 3/4-inch thick. Cut with round biscuit cutter and place biscuits on greased baking pan.  If you want soft-sided biscuits, place biscuits on pan so that they are just touching each other. If you want your biscuits to be crispy on all sides, place them so that there is just a little space between them.


Knead and re-roll remaining dough from first rolling only once. Shape remaining dough from this rolling by hand. Rolling dough out a third time will toughen biscuits.


Bake in pre-heated oven about 10 to 12 minutes or until biscuits are lightly browned. Serve hot.

A Birthday Breakfast


NOTE: Before you consider omitting the sugar, the sugar is what makes the biscuits brown nicely. They will taste just as delicious without the sugar, but may not brown as nicely. 
*Also, if you use one of those non-stick mats on your baking sheet, there is no need to grease your pan.


Wednesday, November 14, 2012

Scalloped Corn

 It is the season for holiday festivities. And at all of those BIG holiday meals, there is always so many wonderful, delicious and rich foods. But sometimes, all of those fancy and rich foods can get to be a little overwhelming, not to mention setting heavy in our tummies.

But there is one vegetable dish that, amidst all of those rich foods, really hits the spot with me during the holidays (or any time of year for that matter). That is my Scalloped Corn recipe. It is always a hit at every dinner I take it to. It is just fancy enough to be a little 'exciting' at a special meal, but simple enough that it is still enjoyable even when you just can't face another bite of fancy, rich food. Best of all, it is simple and quick to make.

Scalloped Corn 

  • 1/2 cup chopped onion
  • 1/2 cup chopped green bell pepper
  • 5 T. butter or margarine (I prefer butter)
  • 2 (15-oz.) cans cream-style corn
  • 1 1/2 cups seasoned bread crumbs
  • 3 large eggs, slightly beaten 
Preheat oven to 375° F. Grease a 1-quart casserole dish and have ready.

Melt butter in skillet and add onion and pepper. Amount of onion and bell pepper you use is adjustable to your own taste. Saute until tender; remove from heat.

Stir in corn and bread crumbs; mix well.

Add eggs and mix well.

Pour into casserole dish and bake, uncovered, for 35 to 40 minutes or until set.


Note: If you have any dry, stale bread, you can crumble that up and use it in place of the seasoned bread crumbs... then just season to taste.
If you have any questions on how to prepare this recipe, please feel free to ask them in the comments. Someone else may be wondering the same thing.


Monday, November 12, 2012

BREAD ON MONDAY - Hot Rolls

This week, people all over the US are bustling around brushing the dust off of their favorite holiday recipes, making their lists, and shopping for all of their special ingredients to begin making their family's favorite Thanksgiving dishes. At my family holiday gatherings, the one thing that I am always asked to make is my Hot Rolls. Everyone seems to think they are the BEST! So this week, I would like to share my recipe with you so that, if you would like to try it for your Thanksgiving gathering, you will have time to play around with it and try it out a time or two before your big holiday gathering. I would like to also add that this recipe easily doubles, or even halves (but trust me, you won't want to make just half a recipe).
Oddly enough, in all the years I have been baking my Hot Rolls, I can't think of one picture I have of them. So as soon as I make some this holiday season, I will add a pic to this post. Feel free to post any questions you might have in the comments.


HOT ROLLS
  • 1 cup warm water
  • 1 tsp. salt (I use unrefined sea salt, but regular is fine)
  • 1 T. vegetable oil
  • 1 large egg, slightly beaten
  • 1 1/2 T. sugar (I use evaporated cane juice, but white is fine)
  • 1 1/2 tsp. rapid rise, instant yeast
  • 3 - 4 cups bread flour -the presifted kind (all-purpose will work fine, but not as light of a texture)
  • melted butter
Before you decide to eliminate any or all of the sugar, keep in mind that it serves two purposes. 1) The sugar is what makes the rolls brown to a nice golden color.  2) The sugar is also what assists with activating the yeast and without it, the rolls will not rise nearly so well, nor be nearly so light and fluffy. I have substituted fructose with fairly good results. 

In large mixing bowl, combine water, salt, oil, egg, and sugar; mix well, using a hand mixer or a wire whisk.

In a separate bowl, stir together 1 1/2 cups of the flour with the yeast. Add this dry mixture to the liquid mixture and  beat on medium speed of a hand mixer until well-blended and smooth.

Stir in enough additional flour to form a stiff dough. Turn out onto a lightly floured surface; knead until smooth and elastic, adding in more flour as needed.

Gently press dough ball down into a lightly oiled bowl; turn dough over, cover bowl with a tea towel and let rise in a warm, draft-free place until doubled in size (about 1 hour).

Punch dough down. Have ready a lightly greased baking sheet. Oil hands. Grab dough in the palm of your hand; squeeze a ball of dough the size of a golf ball up through your thumb and index finger. Pinch off and place on baking sheet.

Repeat until all dough is used, placing rolls close together, but not quite touching. Set in a warm,draft-free place and let rise until doubled in size,about 40 to 45 minutes.

Bake in a pre-heated 350° F. oven for 25 minutes or until golden brown and rolls sound 'hollow' when tapped on with a fingernail.

Remove from oven and immediately brush tops of rolls with melted butter. Sometimes I get lazy and just rub a stick of butter around over the top of the rolls. Serve rolls while hot/warm.

I get about 12 rolls from this recipe, but the number greatly depends upon the size you make them. If you alter the size, make sure you alter the cooking time as well. The last couple of years I have begun making them much smaller for the big holiday meals (about 15-16 per recipe) and people like it much better that way. Those that want just a little bit of bread with their piled high holiday plate don't waste half a roll that way, it is a great size for the kids, and those that want to go back for just a little bit more roll stuffed with some cranberry sauce or gravy to top off their meal, appreciate the smaller size. They can also be made larger and flattened out before baking to use as hamburger buns.
However you make them.... ENJOY!!!

Thursday, October 25, 2012

We're Not Really Lost

Wow! I didn't realize it had been over four months since our last post on here! I also didn't realize I hadn't made a post on this blog telling everyone why I wouldn't be on here for awhile. I do apologize.

Several months back, my main computer (desktop) went on the fritz. It will be awhile before I can save up and get it fixed (or take a whole day off to try a fix that was suggested to me - Thank you!), so until then, I am plugging along on my very old, dinosaur age, but faithfully reliable laptop. I hadn't used it in forever so it has taken a LOT of updates to bring it up to speed (lol, I don't think it will ever be up to speed, really) and it is awkward to use, but it IS working and for that I am ultra thankful!

Then, during all of this, we went into an extreme drought with a record breaking HOT summer. I couldn't use this old laptop in the heat, as it would overheat too quickly, plus every spare minute was occupied keeping gardens watered and trying to keep critters as cool and comfortable as possible. It was a pretty devastating summer and took up all of our time and energy.We spent little to no time cooking, especially in all that heat.

The fall rains came and I had a bit of a break from all that watering, but the weather was so nice, that I took the gamble and replanted a few veggies. I have really missed my fresh cooked okra and squash this year, and wilted lettuce. Well, we finally got a little of the wilted lettuce, and have been thoroughly enjoying some fresh green salads. (I must post a 'recipe' for one of my much loved chef salads, soon.) The summer squash were just beginning to come into production when it got a little dry again. I will, once again have to spend some time watering tomorrow. Then, I will have to bring in my herbs and cover as many plants as possible.

You see, yesterday, we had a near record high temperature, It was suppose to rain today, but I only got a drizzle. Now for the next few nights, we are suppose to experience near record lows! My pumpkins and winter squash have been growing so beautifully since the drought broke, and I couldn't wait for them to get ripe and share my recipes for them with you, but now they may have to be picked early. I may be creating some recipes with 'green' pumpkins. If any of you have such a recipe, I would love it if you shared! We did slice, batter, and fry some young, tender, unpeeled acorn squash, just as we would for fried zucchini and they were amazingly WONDERFUL!  Not sure that would work with the pumpkins, nor the Pink Banana Squash, though. We will see, though, one day at a time, as we get through this unseasonably cold weekend.

That is about all for now. I hope life has found you all happy, healthy, and comfortably filled with good cooking. Have a great weekend and we, along with the Bread on Monday series, will be back very shortly because soon it will freeze, there will be no more garden to tend to for the winter, and I will have lots of indoor cooking and blog posting time.

Monday, June 4, 2012

BREAD ON MONDAY - Special Occasions Pancakes

Oh, my.... we have had such a busy couple of weeks that we have neglected to get anything posted on here since last Monday! This past week, I have been working on a bread recipe that had been brewing in my mind, and I was hoping to post it here today, but it is still coming out too heavy. It is very tasty, and Dave has been a sport and enjoyed eating the 'flops' (poor chickens, lol), but I want to get the kinks out of the recipe before I post the it here. So since I don't have a new bread recipe ready for this week, I am going to post a recipe for the other thing in the bread family that I have been enjoying this week . . . . PANCAKES. For some reason, I just really got into a pancake mood this week.

I have two good pancake recipes that I have developed and used over the years. One is my very tasty, yet very economical recipe (remember, I raised 6 kids), and the other is my even lighter and tastier, 'for special occasions' recipe. It is the latter recipe that I will share with you today.

Special Occasions Pancakes

  • 1 cup all-purpose flour (I use unbleached)
  • 1 tablespoon baking powder (I use aluminum free)
  • 1 tablespoon sugar (I use Zulka)
  • 1/4 tsp. (scant) salt (I use unrefined)
  • 1 cup milk
  • 1 large egg
  • 1 tablespoon vegetable oil
  • your favorite oil or fat for frying
In a medium mixing bowl, mix together flour, baking powder, sugar and salt; set aside.

In a smaller bowl, lightly whisk together milk, egg and oil.

Add the liquid ingredients to the dry ingredients and stir just until all is moistened.

Cook pancakes on a heated, lightly oiled skillet or griddle until covered with bubbles. 

Flip pancakes over and continue cooking until the other side is golden brown. DO NOT 'smash' pancakes with turner, as it will toughen them.
Serve hot with your favorite pancake topping.  Makes about 6 average sized pancakes. 

Monday, May 28, 2012

BREAD ON MONDAY - Using a Bread Machine

   So many people purchase a Bread Machine with great excitement and anticipation of many, delicious, homemade breads to come, only to be discouraged and disappointed when their first loaf or two doesn't turn out. They then usually give up, pack it away, and eventually give that bread machine they had had such high hopes for away or put it in a garage sale.  But . . . . . . DON'T GIVE UP!!!

There is such a variety of variables that goes into making bread, even in a bread machine.

First of all, every bread machine, from one brand to another, can be a little (or a lot) different. For even a BASIC loaf of bread, there could be a 10 to 20 minute baking variance from one brand of machine to another. The mixing times and the rise times may also greatly vary, too. As a result, recipes will need to be adjusted accordingly. For example, if you are using a recipe that was created for one machine, but the machine you are using has a shorter rise time, then you would need to add a sprinkle more yeast than the recipe calls for to account for the shortened rise time.

Even with identical brands and identical models of Bread Machines, there can be some differences. When the machines are manufactured, they try to produce them as identical as possible, but they ARE manufactured by humans and slight differences are a given. Even though the timers may be set the same, there could still be slight variations in the speed of mixing/kneading and/or in the temperature of the machine (rising temp and/or cooking temp). It may take a few loaves of bread to get the 'feel' of your machine before you turn out that perfect loaf. I have had some bread machines where the first loaf, and every loaf thereafter, turned out perfectly. But then I have also had bread machines that got very frustrating when it took 6 or 7 loaves to turn out a loaf that was 'acceptable' and a couple more to finally get it right. (chickens sure were happy, though). But once I got the 'feel' of that darned machine, it was smooth sailing.

Then there are the CRUST settings on the bread machines. One machine's DARK setting might be much darker than another's. One bread machine set to medium may be equivalent to another bread machine set on dark. One bread machine set on light might be absolutely perfect for you, while another one set to light might be way too light for you.

Your ingredients make a HUGE difference, too.  The moisture content of your ingredients not only will vary from brand to brand, but can also greatly vary from one shipment to another, or even change while it is setting in your cabinet (it can dry out or absorb moisture, depending on your weather, climate and  humidity levels in the air).  Thicker liquids (such as juices and pulp) used in your recipe may also have a great variance as to the amount of moisture in them, along with egg size. A larger egg will add more moisture than a smaller egg, and even a tablespoon of moisture can make a huge difference. I absolutely cannot express how much difference the moisture content of your ingredients can affect the outcome of your finished loaf of bread! This is a variable that is usually completely beyond your control, but completely within your control to be able to make necessary adjustments for a great finished product. Most bread still comes out pretty tasty, regardless of the resulting texture.

Because there can be so many variables to a great loaf of bread in a bread machine, recipes ARE NOT set in stone. Don't be afraid to play around with them and adjust them to what you like! Each time you make a loaf of bread, check your dough after it has mixed for a bit. Check it's appearance and give it a poke to see how it 'feels' (very carefully so as not to get your fingers in the paddle - DO NOT let kids do this!) Make sharp mental notes of this and, after a time, you will know exactly what your dough for a great loaf of bread is suppose to look and feel like so that you can make adjustments as necessary.

Make adjustments? Yes, you can make adjustments, even after all ingredients are in and it has begun mixing. On most bread machines, there is a 'bell' (okay, mine beeps) that goes off part way into the cycle to let you know it is time to add other ingredients, such as nuts, raisins, and any other things that you didn't want beat to death during the entire mixing process. All the way up to and including when this little bell goes off, you can add/adjust your ingredients. After you have learned what to watch for, if you think your dough is too dry, you can add a sprinkle more water (or liquid ingredient used). But be careful! A little bit of moisture will go a looooong way! The same holds true for your flour (dry ingredients). If your dough is looking to soft, or sticky, you can, during this same time frame, add a bit more flour (or dry ingredient). But once again, a little goes a long way. And even if it looks a bit sticky at this point, it will usually smooth out a bit after it mixes a little longer.

It really isn't complicated, though. It's just that, when you purchase a bread machine, you also need to add into your initial costs a big round of ingredients for testing purposes, understand that that is part of the process for beginning to learn to use a bread machine, and don't worry about a few lost loaves. Now, I said that, at times, I had some pretty happy chickens, but I wasn't always allowed to give those 'failed' loaves to the chickens. You see, even though I sometimes got (and still do when I get a new machine) frustrated because those first few loaves weren't coming out right, my family and friends around me WOULD NOT let me toss them out!!! They said that they were still MUCH BETTER than the store bought stuff and gobbled it all up, thoroughly enjoying it!!!


Don't be afraid of your machine, take notes each time you use it for awhile (and keep them handy for future use), and by all means, don't be afraid to experiment. Don't be too hard on yourself. And don't be afraid to deviate from, or play around with, your bread recipes. It's just bread. Regardless of how it turns out, your home is still going to be filled with the scrumptious aroma of baking bread, and that alone is worth the try! Even if the end result isn't what you were trying to achieve, chances are, it is still going to be pretty darned good bread!  Stay tuned for future Bread Machine Tips.

Wednesday, May 23, 2012

SEASONED GREEN BEANS

 Years ago, when I worked in a grade school cafeteria, the green beans we were instructed to make were TERRIBLE! Upon seeing so many of them thrown in the trash, my co-worker, C, and I decided that we would create our own green bean recipe that the kids would like.

C and I compared how we each cooked green beans for our families, then combined our recipes together to create a Seasoned Green Bean recipe that the kids at school not only liked, but came back for seconds on! Not even the juice off of the was dumped.

After I eventually left for a different job, I continued to cook the C & A Green Beans for my own little brood at home..... they would have them no other way. And I still cook them this way for even just me. Here is our recipe:

Seasoned Green Beans
  •  9 slices (thin) bacon
  • 3/4 c. chopped onions (1 medium)
  • 2 cloves garlic, peeled and thinly sliced
  • 3 (14.5-oz) cans cut or French Style green beans
  • 1/4 rounded tsp black pepper (or to taste - optional)
  • 3/4 tsp. salt, or to taste
  • 1/2 tsp. granulated garlic (can also use garlic powder)
  • 1 T. butter
  • potatoes, peeled and cut into chunks (optional)
 In a large cooking pot, fry bacon until nearly crisp.
 Remove bacon, crumble and set aside. Add onions and garlic to bacon grease and saute just until onions are tender.
Add green beans, pepper, salt, granulated garlic (or powdered), butter,  and crumbled bacon.  Bring to a boil, reduce heat and simmer, stirring occasionally, for about one hour.
If desired, add in large, raw potato chunks during the last 20 minutes of cooking; continue cooking until potatoes are tender.
Serve as a side dish with your favorite entree, or on its own with a side of Fried Cornbread. Even finicky green bean eaters will come back for more! 

Note: this is definitely a dish where any of your ingredient amounts can vary to your own taste without harming the recipe.
For my own personal tastes, I use much more fresh garlic. 
This recipe can also be easily adapted for use with Fresh Green Beans.

Monday, May 21, 2012

Bread On Monday - Blueberry Muffins

It has been a very hectic week. The flea market where I have my little shop at had it's HUGE annual Spring Fling sale this weekend. I am happy to say that it was a great success! I did not; however, get any baking done, although I have been dreaming all week of baking some fresh, hot, blueberry muffins. Since I am still just dreaming of them and haven't gotten to bake them yet, I thought I would at least share my recipe with you in case your are craving them, too, and have an hour or so free to get a batch made. Here is the recipe I came up with over the years, a recipe that has become my family's favorite!

BLUEBERRY MUFFINS
  • 2 cups all-purpose flour
  • 1 T. baking powder
  • 3/4 cup granulated sugar
  • 1/2 tsp salt
  • 1 large egg
  • 1/3 cup vegetable oil
  • 1 cup milk
  • 1 cup fresh or frozen blueberries
  • melted butter, optional
  • cinnamon, optional
  • extra granulated sugar, optional

In medium mixing bowl, stir together flour, baking powder, sugar and salt. Set aside.  Beat together egg, oil and milk.  Add to dry ingredients and stir just until moistened.  Fold in blueberries.  Fill greased muffin tins 2/3 full with batter.  Bake in a pre-heated 400°F oven about 20 minutes or until lightly brown on top, but still moist.  Serve as is or, while warm, brush tops with melted butter and roll in granulated sugar.

Actually, our FAVORITE way is to stir a spoonful of cinnamon into half a cup to a cup of granulated sugar (amount of cinnamon is up to the personal taste), then roll the buttered muffin tops around in the cinnamon-sugar mixture.Oh, and if you like LOADS of blueberries in your muffins, it works just fine to add extras into the batter. This recipe also doubles well. I have even gotten lazy and baked it in a regular cake pan (as a quick bread) with great results.

I am determined to get some baked this week. When I do, I will post a pic of them with this recipe. I hope you enjoy!

Tuesday, May 15, 2012

Wild Salad

   I love fresh, green salads! Often times I can make a whole meal off of them. When my body gets in its 'craving salad mode' (and it often does), I pretty much live on salads for days... even weeks .... at a time. Usually, this means that your body is needing something that is in the salads and you should go with your craving (so long as it is healthy stuff).

The other day I got in a MAJOR salad mood, didn't have any salad fixin's here at home, the salad items in the garden aren't ready yet, and I didn't want to drive in to town just to buy salad makings, so I decided to take a stroll in my yard to see what I could throw together. The picture you see on the left was the end result of my Wild Salad walk. Drizzled with a little "juice" I had saved from a jar of marinated artichoke hearts, I had a very tasty salad for the cost of nothing.

The wild greens that are available for a fresh salad vary greatly as the seasons change. But from late winter, all the way up until the weather really begins to get hot, you can almost always find a readily available supply of fresh greens for a very tasty fresh salad. But be sure and pick only greens that have not been touched by any chemicals, such as insecticides or fertilizers. Here is what this salad included:

WILD SALAD

  • Lambsquarters (wild spinach, goosefoot)
  • Asiatic Day Flowers (blue flowers and leaves)
  • Wood Sorrel (Sheep Showers - a very lemony flavor)
  • Wild Garlic Chives (from first year wild garlic)
  • Honeysuckle flowers
  • Mulberries (wild black)
  • Redbud Tree Leaves
  • Yellow Dock Leaves
  • Perilla Mint (Shiso)
  • Plantain (the green, leafy plant, NOT the bananas)
  • Chick Weed (a little difficult to find this time of year, but I found one in the deep shade)
Wash your salad ingredients thoroughly in cool water and pat dry with toweling. Although it is important to wash the dust, dirt and possible critter pee off of your fresh greens, I did not wash the delicate flowers, as they just seemed too delicate. 

The amounts of each green used are strictly up to the individual and their taste preferences. I used very little Perilla Mint because I don't care for its licorice flavor, but a little did lend a lot to the overall flavor blend of the salad. Some people, though, might like much more of the licorice-like flavor in their salad. Make sure you pick only the young, tender leaves of your greens for your raw salad, otherwise, they might be tough and/or too strong (overpowering other items in the salad mix). 

The mulberries are actually black mulberries (as you can see by the one on the upper right), but Dave and I recently ate all the ones we could reach on my tree as we stood and chatted one evening, so we are having to wait for some more to ripen. But the reddish ones were still very good in this salad.The flavors of them, the honeysuckle and the garlic... all in the same bite .... blend especially well. 

Serve with your favorite salad dressing and a slice of homemade bread or crackers. Mmmm..... it just doesn't get much better! 

 Note: The larger Redbud lambsquarters leaves were more for decoration. The younger, more tender ones in the salad were the ones for eating. 
CAUTION: ALWAYS BE SURE YOU KNOW THE TRUE IDENTITY OF THE PLANT(S) YOU ARE EATING!    


Thursday, May 10, 2012

Fried Potatoes & Onions with a Twist

I love Fried Potatoes and Onions. Sometimes I get in the mood for them and practically live on them for days. Although there is a lot of health benefits to them, eating them for dinner several days in a row can leave you lacking in protein and green vegetables.

This week, once again, found me in a Fried Potatoes and Onions mood, but I decided I really needed to do something to make it a more well rounded meal. As I got the potatoes to cooking, I pondered what else I could toss in with them. The following is what I came up with. No, the ingredients are not in exact measurements. Every ingredient in this recipe is easily varied according to the individual taste bud. There are no right and wrong amounts of any one ingredient. So have fun with it and enjoy... it is REALLY GOOD!

 
Fried Potatoes & Onions with a Twist
  • 1 small to medium onion (variety is your choice, I used a strong yellow one)
  •  a few potatoes (I used 4 russets, but I especially like to use red for frying)
  • about a quart of fresh, cleaned lambsquarters (can also use fresh or frozen spinach or other greens, such as turnip or mustard)
  • fresh farm eggs (I used 4, a ratio of about 1 per potato)
  • salt to taste (and pepper if you wish)
  • cooking oil (I used peanut oil)
 In a large skillet, add just enough cooking oil to pool a little on the bottom of the skillet. I especially like to use a good, well-seasoned iron skillet for this.

While the skillet of oil is beginning to heat up, peel the onion, wash and chop it up into the skillet into medium-sized, uniform pieces. The size and shape of the onion pieces is strictly personal choice.

Next, peel, wash and slice up the potatoes, then add them into the skillet with the onions. Give a little stir to coat the potatoes with oil and move the cooking onions around a bit. I like to use a heavy spatula for this.

Continue to 'fry' the potatoes and onions, turning over occasionally, just until the potatoes begin to have a little 'give', but are still a little firm. At this point, place the fresh greens on top of all and spread out evenly in the skillet. Loosely place a lid over all so that the greens can begin to steam and wilt.

In a few minutes, after the greens have begun to really wilt, and using your spatula, turn everything over, spreading the greens around well. Loosely return the lid and continue this process every few minutes until the potatoes and the greens are done to your desired tenderness. But just before they hit the desired tenderness, add in a little salt (and other desired seasonings) to taste, keeping in mind that the lambsquarters are naturally salty tasting.

 Just as everything appears done to your liking, before you turn the heat off, break the eggs and drop them in on top of all (can pre-scramble the eggs if desired, but not necessary). Break the yokes and let the eggs begin to cook. Gently stir and fold everything in the skillet a few times as you allow the eggs to cook. They will cook very quickly!  Remove from heat and serve immediately, adding more salt if desired. Serve as is or topped with salsa, ketchup or Sweet Vidalia Onion salad dressing. An added side dish of fruit also goes great with it and helps to further balance out the meal. Not only is this meal highly nutritious, but ultra thrifty as well. I think that next time, I am going to try also adding in some fresh sliced mushrooms as I add in the greens. Enjoy!