Friday, November 30, 2012

Cooking Tip #1 - Wash Those Pumpkins!

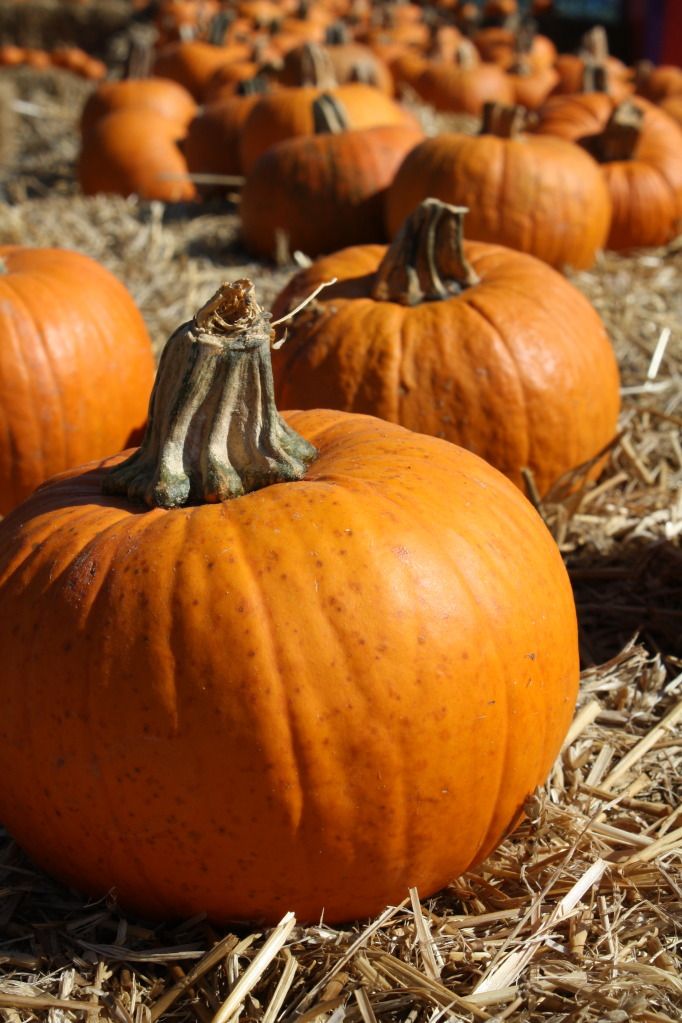
 Many people, at this time, are canning and freezing up their bountiful harvest of pumpkins, putting up the ones they found on that wonderful super sale after Halloween and Thanksgiving were over, or just plain making up some delicious pumpkin pies. Pumpkins are so versatile and packed with nutrition, they are well worth the effort of putting them up for use all year long.

But before you begin to cut into one of those pumpkins, be sure and wash the entire outside off thoroughly with a naturally antibacterial soap. Give it a good scrubbing. Make extra sure you get into all of those creases and crevices. Weather you purchase your pumpkin at the grocer, from your local farmer's market, or grow it yourself, there is always the risk that odd, unusual and even dangerous germs could be lurking on the skin of those pumpkins. The cooler, damper climate of Fall, with fluctuating warmer days just before pumpkins are harvested, can lend to a faster growth/spread of some germs and fungi. A good scrubbing should easily take care of anything that might pose a danger and is very easy to do.

Then let your pumpkin(s) air dry. Don't get in a hurry and be tempted to dry them off with that dish towel that is setting right there at your fingertips. You will just put germs right back on your pumpkin! Especially for long term storage, you want every germ possible off of your pumpkin before you cut into it. If you don't wash them, and any unsafe germs are on the skin of your pumpkin, the moment you stick your knife into it, you push the germs right inside, where they quickly absorb into the softer flesh.

Have a happy and tasty holiday season, and watch for more great cooking tips to come!

Monday, November 26, 2012

BREAD ON MONDAY - Puffy Dumplings

 Throughout the winter, I love to make a lot of soups and stews. Sometimes I like cornbread with them, and sometimes hot rolls, bread, or just plain crackers. But often times I especially like to mix up a batch of my Puffy Dumplings and drop on top of a steaming hot pot of soup/stew. They puff up nice and fluffy, while a just a little of the soup adheres to the bottom of the dumpling. Mmmmm..... are they good! They are also great in Chicken and Dumplings or, as many are making right now with their leftover turkey... Turkey and Dumplings. Here is my recipe.  Make sure your soup is boiling/simmering, or nearly there, before beginning. This recipe easily doubles if you are cooking a large kettle of soup.  Picture to be posted soon.

PUFFY DUMPLINGS

  • 1 cup all-purpose flour (I prefer unbleached)
  • 2 tsp. baking powder
  • 1/2 tsp. sugar
  • 1/2 tsp. salt
  • 1/2 cup milk
In medium bowl, sift together flour, baking powder, sugar and salt.

Stir in milk and mix well.

Drop large, rounded tablespoonfuls into hot, boiling/hard simmering, stew, soup, or chicken and dumplings. Give a quick, gentle stir to make sure all dumplings are coated with the hot liquid and are separated.

Cook, uncovered, 10 minutes. . . . Cover and cook for about 10 minutes more, or until dumplings do not appear doughy in center. This time could vary according to the size of your dumplings. Sometimes I like to make mine a little bigger than this (larger spoonfuls of dough).

It is VERY IMPORTANT that you do NOT open the lid during the second half of the cooking time or dumplings could become very soggy. Also do not stir during any of the cooking time.

If you want to add a little additional flavor to your dumplings you can add a little powdered seasoning (such as poultry seasoning, garlic powder, onion powder, etc.) to your dry ingredients before mixing in the milk.

Serve hot, but be careful! These dumplings stay hot in the center for a very long time. Be especially careful when serving to small children. 

Thursday, November 22, 2012

HAPPY THANKSGIVING - 2012

FROM ALL OF US AT

TWO FARMS ONE

WE WOULD LIKE TO WISH YOU THE 

SAFEST, HAPPIEST, AND MOST BLESSING FILLED

THANKSGIVING YOU HAVE EVER HAD!!!


HAPPY THANKSGIVING!!!

AND TO THOSE OF YOU OUTSIDE OF THE US

HAVE A VERY BLESSING FILLED DAY!

Monday, November 19, 2012

Bread on Monday - Homemade Biscuits

As the chilly mornings of Fall begin to move towards the downright cold mornings of Winter, nothing beats a fresh, piping hot pan of homemade biscuits for breakfast. On a really ambitious day, I like to make up an extra big batch of biscuits, then warm the remaining biscuits up to eat with a big bowl of homemade soup or stew for dinner. Then, on this particular week (Thanksgiving week), any extras you might have (I know, leftover biscuits are rare), are great crumbled up and tossed into your Thanksgiving Dressing pot. Feel free to ask any questions you might have about this recipe, in the comments. If you are wondering something, chances are, someone else is too.

Anna's Homemade Biscuits

  • 2 cups all-purpose flour (I prefer to use unbleached)
  • 1 T. baking powder (I use aluminum free)
  • 1/2 teaspoon salt (I use natural sea salt - processed without chemicals)
  • 1 teaspoon sugar (I use evaporated cane juice, but any sugar is fine)
  • 1/3 cup vegetable shortening
  • 3/4 cup milk
  • a little extra flour

Preheat oven to 450° F. Grease and have ready a biscuit pan or baking sheet.

In a medium bowl, sift together flour, baking powder, sugar, and salt; mix well.

With a pastry cutter/blender (or fork or knives), cut shortening into flour mixture until evenly crumbly.

Add milk to flour mixture. Mix together well, finishing mixing with the hands, as it becomes very thick. Knead dough a few times, adding in a little more flour, if necessary, so that dough is no longer sticky. Careful not to get too much flour as this will make biscuits tough.
 
On a floured board or pastry cloth, roll dough out to 1/2 to 3/4-inch thick. Cut with round biscuit cutter and place biscuits on greased baking pan.  If you want soft-sided biscuits, place biscuits on pan so that they are just touching each other. If you want your biscuits to be crispy on all sides, place them so that there is just a little space between them.


Knead and re-roll remaining dough from first rolling only once. Shape remaining dough from this rolling by hand. Rolling dough out a third time will toughen biscuits.


Bake in pre-heated oven about 10 to 12 minutes or until biscuits are lightly browned. Serve hot.

A Birthday Breakfast


NOTE: Before you consider omitting the sugar, the sugar is what makes the biscuits brown nicely. They will taste just as delicious without the sugar, but may not brown as nicely. 
*Also, if you use one of those non-stick mats on your baking sheet, there is no need to grease your pan.


Wednesday, November 14, 2012

Scalloped Corn

 It is the season for holiday festivities. And at all of those BIG holiday meals, there is always so many wonderful, delicious and rich foods. But sometimes, all of those fancy and rich foods can get to be a little overwhelming, not to mention setting heavy in our tummies.

But there is one vegetable dish that, amidst all of those rich foods, really hits the spot with me during the holidays (or any time of year for that matter). That is my Scalloped Corn recipe. It is always a hit at every dinner I take it to. It is just fancy enough to be a little 'exciting' at a special meal, but simple enough that it is still enjoyable even when you just can't face another bite of fancy, rich food. Best of all, it is simple and quick to make.

Scalloped Corn 

  • 1/2 cup chopped onion
  • 1/2 cup chopped green bell pepper
  • 5 T. butter or margarine (I prefer butter)
  • 2 (15-oz.) cans cream-style corn
  • 1 1/2 cups seasoned bread crumbs
  • 3 large eggs, slightly beaten 
Preheat oven to 375° F. Grease a 1-quart casserole dish and have ready.

Melt butter in skillet and add onion and pepper. Amount of onion and bell pepper you use is adjustable to your own taste. Saute until tender; remove from heat.

Stir in corn and bread crumbs; mix well.

Add eggs and mix well.

Pour into casserole dish and bake, uncovered, for 35 to 40 minutes or until set.


Note: If you have any dry, stale bread, you can crumble that up and use it in place of the seasoned bread crumbs... then just season to taste.
If you have any questions on how to prepare this recipe, please feel free to ask them in the comments. Someone else may be wondering the same thing.


Monday, November 12, 2012

BREAD ON MONDAY - Hot Rolls

This week, people all over the US are bustling around brushing the dust off of their favorite holiday recipes, making their lists, and shopping for all of their special ingredients to begin making their family's favorite Thanksgiving dishes. At my family holiday gatherings, the one thing that I am always asked to make is my Hot Rolls. Everyone seems to think they are the BEST! So this week, I would like to share my recipe with you so that, if you would like to try it for your Thanksgiving gathering, you will have time to play around with it and try it out a time or two before your big holiday gathering. I would like to also add that this recipe easily doubles, or even halves (but trust me, you won't want to make just half a recipe).
Oddly enough, in all the years I have been baking my Hot Rolls, I can't think of one picture I have of them. So as soon as I make some this holiday season, I will add a pic to this post. Feel free to post any questions you might have in the comments.


HOT ROLLS
  • 1 cup warm water
  • 1 tsp. salt (I use unrefined sea salt, but regular is fine)
  • 1 T. vegetable oil
  • 1 large egg, slightly beaten
  • 1 1/2 T. sugar (I use evaporated cane juice, but white is fine)
  • 1 1/2 tsp. rapid rise, instant yeast
  • 3 - 4 cups bread flour -the presifted kind (all-purpose will work fine, but not as light of a texture)
  • melted butter
Before you decide to eliminate any or all of the sugar, keep in mind that it serves two purposes. 1) The sugar is what makes the rolls brown to a nice golden color.  2) The sugar is also what assists with activating the yeast and without it, the rolls will not rise nearly so well, nor be nearly so light and fluffy. I have substituted fructose with fairly good results. 

In large mixing bowl, combine water, salt, oil, egg, and sugar; mix well, using a hand mixer or a wire whisk.

In a separate bowl, stir together 1 1/2 cups of the flour with the yeast. Add this dry mixture to the liquid mixture and  beat on medium speed of a hand mixer until well-blended and smooth.

Stir in enough additional flour to form a stiff dough. Turn out onto a lightly floured surface; knead until smooth and elastic, adding in more flour as needed.

Gently press dough ball down into a lightly oiled bowl; turn dough over, cover bowl with a tea towel and let rise in a warm, draft-free place until doubled in size (about 1 hour).

Punch dough down. Have ready a lightly greased baking sheet. Oil hands. Grab dough in the palm of your hand; squeeze a ball of dough the size of a golf ball up through your thumb and index finger. Pinch off and place on baking sheet.

Repeat until all dough is used, placing rolls close together, but not quite touching. Set in a warm,draft-free place and let rise until doubled in size,about 40 to 45 minutes.

Bake in a pre-heated 350° F. oven for 25 minutes or until golden brown and rolls sound 'hollow' when tapped on with a fingernail.

Remove from oven and immediately brush tops of rolls with melted butter. Sometimes I get lazy and just rub a stick of butter around over the top of the rolls. Serve rolls while hot/warm.

I get about 12 rolls from this recipe, but the number greatly depends upon the size you make them. If you alter the size, make sure you alter the cooking time as well. The last couple of years I have begun making them much smaller for the big holiday meals (about 15-16 per recipe) and people like it much better that way. Those that want just a little bit of bread with their piled high holiday plate don't waste half a roll that way, it is a great size for the kids, and those that want to go back for just a little bit more roll stuffed with some cranberry sauce or gravy to top off their meal, appreciate the smaller size. They can also be made larger and flattened out before baking to use as hamburger buns.
However you make them.... ENJOY!!!